My Welding Experience!
Hello again, I'm back with another post for my blog. These last couple of weeks I've been in the process of learning a new skill from my machines and tools class. I learned how to weld! In this post I will also show you the steps so you can also weld.
Q:So what's the first step?
A: First things first, I started off by looking around the room for some metal I could use. I found a piece but it was huge in length so I had to cut it down into several pieces.
Q:How did you cut down the metal into several pieces?
A: The way I cut it down is by using this saw that is used specifically for this type of job. It is a metal cut-off saw. I had to cut off the pieces by four inches long.
Q: What type of safety precautions did you take while handling this type of machinery?
A: While I was using the saw I used a face shield mask as you can see on top. I had to use this this type of mask because, when in use, the saw will start to throw sparks everywhere, so protecting your vision is important.
Q: Did this machine have any type of fail safe?
A: This machine indeed did have a fail safe. As you can see in the picture, my thumb is on the button that lets you use the saw, meanwhile my finger is on the trigger which starts the machine. You need to hold both in order for the saw to work. Without it, the saw will not start.
Q:What did you do to exhaust the sparks the saw threw?
**Keep in mind, you will have to keep it on when using the saw and when you are welding.**
Q:What do you do when you have all your pieces cut out?
A: After I finished cutting out my pieces, I had around 12 pieces overall, but since the cutting was rough I had to sooth out the edges of all the pieces.
Q: How were you able to smooth out the edges of metal?
A: The way I was able to smooth out the edges was because I used a filer. The way a file works is by using the back of it and moving it back and forth to smooth out all that is rough.
Q:May you show how to file properly?
A: Sure I can! When using a filer You use the back of it and it is best when you are behind the object you are trying to file. After that you simply go back and forth in a area until you feel that it's smooth and you are sure there is no chance you can get cut.
Q: After you were done filing what was the next step?
A: After filing my metal properly, before welding I cleaned my metal with some denatured alcohol. Why do you have to clean it? Well I cleaned it with alcohol because it helps ungrease the metal so when you wield it will be an easier experience.
Q: Alright!! So after cleaning are you finally ready to weld??
A: Well I am close but not quite yet. The tool above is called a clamp. You are going to need it because when you are welding may I remind you, It will be extremely hot and you won't be able to hold the metal, so the clamp is a way to grab it safely.
Q; I understand so did you just stick both pieces together?
A: Actually there is a specific way to put both pieces together you are supposed to put it in a Z formation so you can weld better.
Q:So after you were done with that were you finally able to weld?
A: Yes I am! Remember safety first. That is why for welding I used a different type of mask. I used a welding helmet which is specialized in this type of field area. When you weld you will produce a type of light which is really powerful. Don not look at it if you don't have any proper eye ware, it could permanently damage something.
Q: Is there any other type of safety you need to wear?
A: Yes you should use a heavy layered coat like the one I'm wearing while welding. Also Wear gloves that are fitted for this type of job. The one I'm wearing doesn't let heat through as much.
Q: How did you start welding?
A: Since I was new to this I was instructed to start off small. I got the hang of it fast and I just spotted two spots in where I can weld.
Q: Were you able to weld a whole piece together in a few tries?
A: It took a bit more then just a few tries. I started to get the hang of it by trial and error. On top of the metal you can see how poor of a mess it is, and how everything is basically everywhere. However, after a few tips and tricks from my teacher I learned to keep a steady hand while doing this. Also when welding you have to keep in mind, you have to let a pool of the heated metal appear before you can continue. Otherwise, you just end up like the first one on top.
Q: Wow so after you knew how to do the process were you able to succeed a lot more?
A: You could see in my work that I have been doing better then before, but it wasn't good enough just yet. I moved my hand way too fast when welding so as usual little bubbles as you can see on top kept on popping everywhere. I kept on reminding myself to make a pool before advancing. Also when welding two pieces you have to make a pool before you continue, and when you make one you have to make like a C formation to connect both pieces. You go up and then back down, wait for a pool and then repeat.
Q: Was there something that you had to do every time you finished welding?
A: Yes actually, when finished welding you had to pick up a brush that would take out all the dust that the machine produces. After you brush, you will see the aftermath of your welding.
Q: What does it look like when you finally are able to weld two pieces successfully?
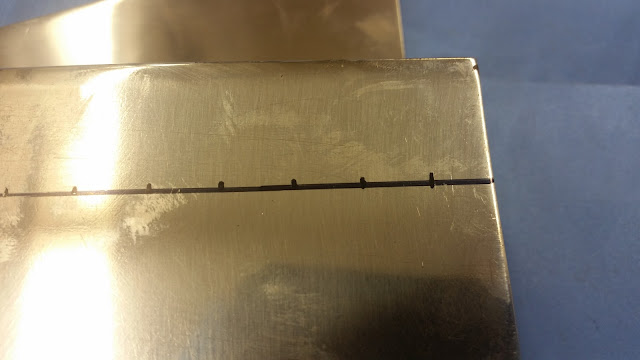
A: I finally was able to do it and when I saw this I was happy that I finally knew how to do it properly. That was a solid weld, with no holes. The structure was built with no gaps in between.
Q: Why is a gap bad to have in between the weld spots?
A: Here is an example why it is bad. You see a paper, it has the cutout of a square on one side and a cutout of a quarter circle. When one person holds the square part while another is pulling the square will break easily. Now try to do the same on the quarter circle. It doesn't rip as as easy as the square. that's because it is better built.
Q: Oh so you try to avoid the as much as possible?
A: Yes of course, as you can see in the picture the pencil is pointing to one of the three gaps in that metal.
Q: So did you finish a piece?
A: In the end I finally did a whole piece and it looked pretty nice. Thanks to welding I have another skill and I also was able to have fun while learning new things. That was my welding experience thank you for giving me a piece of your time and I'll catch you all later!!


Comments
Post a Comment