Making a Dustpan!!!! Part 1 of 2.
Hey guys! I'm back with another project that I learned in my machines and tools class. There are only a few school days left, and I decided I wanted to make one last project before the school year was over. So I present to you, how you can do your own dustpan.
Q:What happens after I do the paper cut out?
A: After you are doe with the paper cut out, you will now have your measurements, and will be able to proceed to the next step. The next step is to look for a big enough sheet metal, and outline it with a marker and cut it out.
Q:After i cut the metal and have my piece of metal do I start hammering?
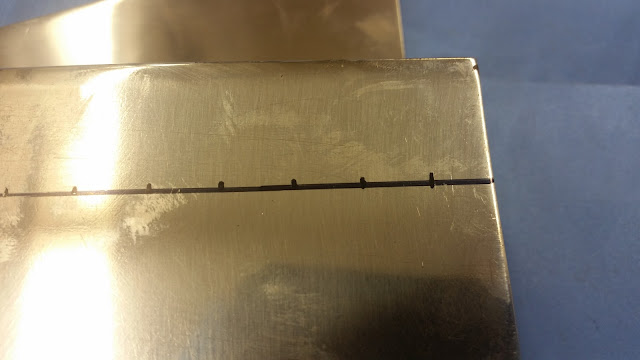
A: Not quite exactly, see after you cut the metal out, my teacher showed me how to get perfect edges around the corners. You find something circular that has a diameter of three inches. As you can see I marked 1.5 inches from the corer and now all you have to do is follow the curve and cut.
Q:What does the final piece look by the end of this part?
A:By the end you should have it seem like the one on top. When I cut it, some part seemed a bit too rough. Remember, if its only necessary file the edges until they are smooth.
Q:Okay, but after you cut it is there any safety hazards?

A:Yes there is actually, right after you cut the edges, make sure to cut down the little bit of strip metal you cut off into pieces. Those little strips can get sharp and someone might get cut.
Q: After I file the edges what am I supposed to do afterwards?
A: After you file both edges, it is time to shrink the metal in order to make it curve.
Q:Shrink?!?!?!? What do you do in order to shrink metal?

A:This process gets difficult so stay with me. The machine I used was called a Pullmax. Now, this machine is not easy to come by. I was lucky enough to have this type of heavy machinery at m school. Not many schools have this type of machinery and it is an expensive piece of art.
Q:is it dangerous? What type of per cautions did you take?

A: like I said earlier, this a heavy machine which also means it comes with some big risks. In order to get its full extent, you have to put the corners in the middle all they way in and then pull out. The thing is when you pull out, you have to pull downward. You need some strength but when you do both sides you will practically have your curves down. Also be careful with the fingers you only have ten.
Q: So after using the machine will you be done?

A: After I used the machine, it made it look way better than it was. It still had a few bumps here and there, so I had to hammer it out!
Q:Did you use any type of hammer?
A: Not just any type, I used a specific hammer for this job. As you can see above, there is a hammer on dolly and hammer off dolly. A dolly is the big object on the right which helps flatten out the surface. When using it you have to be hearing because it makes a special sound when you are done flatting out. Go to much and you will expand the metal.
Well I'm sorry guys, but unfortunately I'm not done with my project just yet but check back in a few days and i will have part two of this blog ready, thanks again for checking out my blog and I hope you have a marvelous day!


Comments
Post a Comment