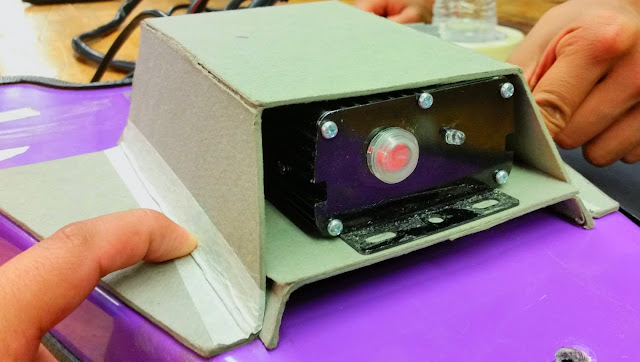
Making A Case For A Battery Controller (Part 3 of 4)
Hey guys! Welcome back to the final part of this project.I'm excited to show you guys how much has happened since the last time.😊
There was a little problem I ran into, by mistake I drilled the wrong size into the piece. Thankfully there was a rivet that was bigger than the normal ones.
I was holding the piece and the base together so I can drill the hole in the right place. The temporary rivets are the things that are holding it together.
This is how it looks like after drilling a hole in every single one of them and having a temporary rivet take place. I have finally finished this segment and now I moved to designing the piece.
One of the many various designs I was shown was engine turning. Its done by having this small metal brush spin at a certain spot for a few seconds.
This is how it looks like after it is done, and it caught my attention. However, it is risky the reason being, if you screw up one of their positions, the whole thing gets ruined.
This is an action shot of me using the drill press and doing engine turning on the piece. It is visible that I used the piece of wood as a fence to keep the piece straight.
This is the result of the engine turning, and it was my first attempt. Before I proceeded to use this pattern for my piece, I decided I was going to look at one more type of design.
I was taught another design and it is called polishing. Before I polished a piece I had to sand it down with five different type of sanding paper, each one more finer than the one before. I believe the grit was as follows: 160, 200, 300, fine, and the red one was finer.
In the picture above, I am polishing the piece with a polishing wheel. This process is slow and takes time to get the best result out of it.
The end result of the piece had me astonished. You were even able to see my reflection.
So this was an idea I had, and it consists of doing both designs of engine turning and polishing. I believe it will come out great if I'm able to pull it off.
I have to start from the begging with my project and I have to sand it all down. I also have to go through all five of the sanding stages.
I learned that it would be better if you cleaned the rough surface of the polishing wheel with sandpaper. The sandpaper I used above is 36 grit so it is really coarse.
This is an action shot of me polishing my piece. It took a lot of patience and a process of cleaning the polishing wheel, applying red, polish and then repeat again.
I was holding the piece and the base together so I can drill the hole in the right place. The temporary rivets are the things that are holding it together.
This is how it looks like after drilling a hole in every single one of them and having a temporary rivet take place. I have finally finished this segment and now I moved to designing the piece.
One of the many various designs I was shown was engine turning. Its done by having this small metal brush spin at a certain spot for a few seconds.
This is how it looks like after it is done, and it caught my attention. However, it is risky the reason being, if you screw up one of their positions, the whole thing gets ruined.
The sketch above was how I imagined the piece would look like after doing engine turning on it. Thanks again to my teacher for making the sketch, and help me visualize how it would look like.
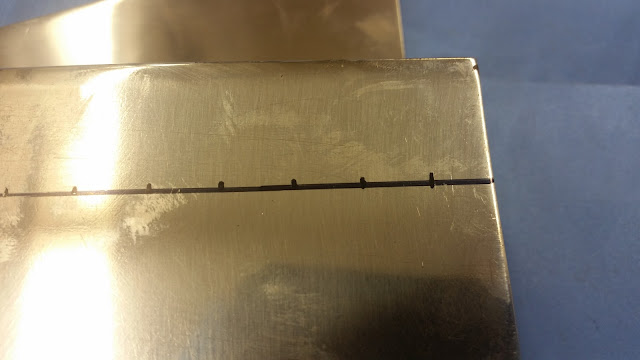
In order to practice my engine turning, I measured the diameter of the whole thing and I marked it a radius from each other. That means in a line, I marked it every half of an inch.This is an action shot of me using the drill press and doing engine turning on the piece. It is visible that I used the piece of wood as a fence to keep the piece straight.
This is the result of the engine turning, and it was my first attempt. Before I proceeded to use this pattern for my piece, I decided I was going to look at one more type of design.
I was taught another design and it is called polishing. Before I polished a piece I had to sand it down with five different type of sanding paper, each one more finer than the one before. I believe the grit was as follows: 160, 200, 300, fine, and the red one was finer.
In the picture above, I am polishing the piece with a polishing wheel. This process is slow and takes time to get the best result out of it.
The end result of the piece had me astonished. You were even able to see my reflection.
So this was an idea I had, and it consists of doing both designs of engine turning and polishing. I believe it will come out great if I'm able to pull it off.
I have to start from the begging with my project and I have to sand it all down. I also have to go through all five of the sanding stages.
I learned that it would be better if you cleaned the rough surface of the polishing wheel with sandpaper. The sandpaper I used above is 36 grit so it is really coarse.
This is an action shot of me polishing my piece. It took a lot of patience and a process of cleaning the polishing wheel, applying red, polish and then repeat again.


Comments
Post a Comment